2. Workshop Connections in viiaPackage
2.1. Connections in DIANA
You can find the theory of connections in DIANA here: Connections in DIANA.
2.2. Connections in viiaPackage
The workflow of connections in viiaPackage can be found here: Common connection configurations.
You can find the theory of connections in viiaPackage here: Connections in viiaPackage.
Note
viia_create_interface is no longer supported.
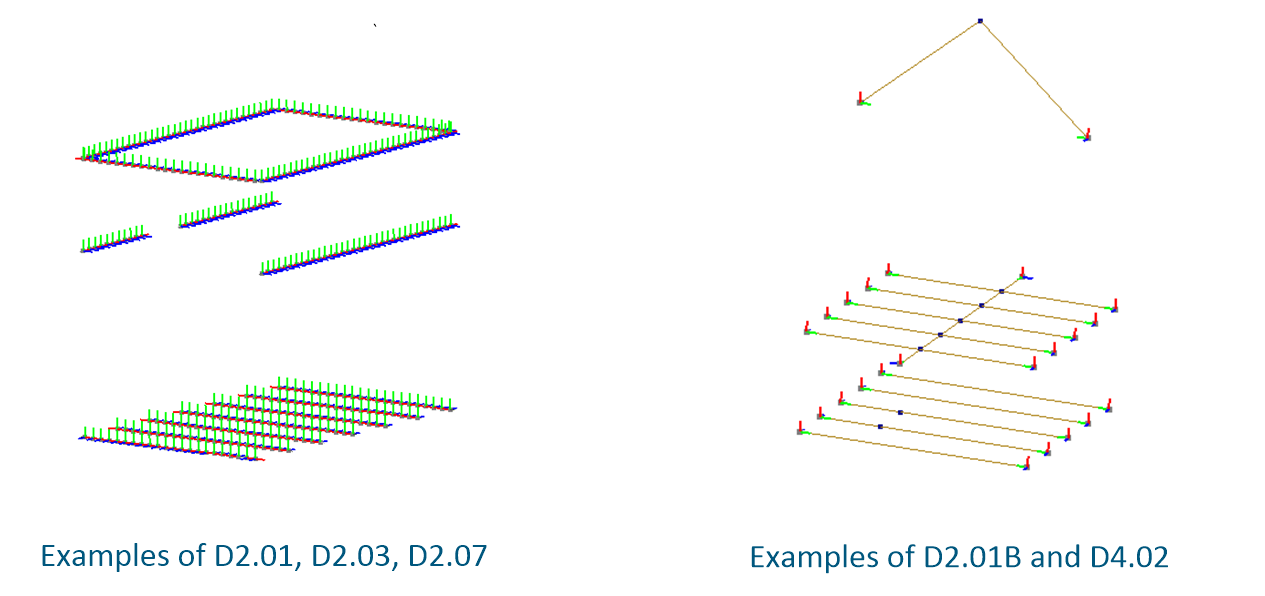
Figure 2.1 - Example local axis of connections in DIANA.
2.2.1. General connection modelling workflow
General approach of connections in your model for VIIA is:
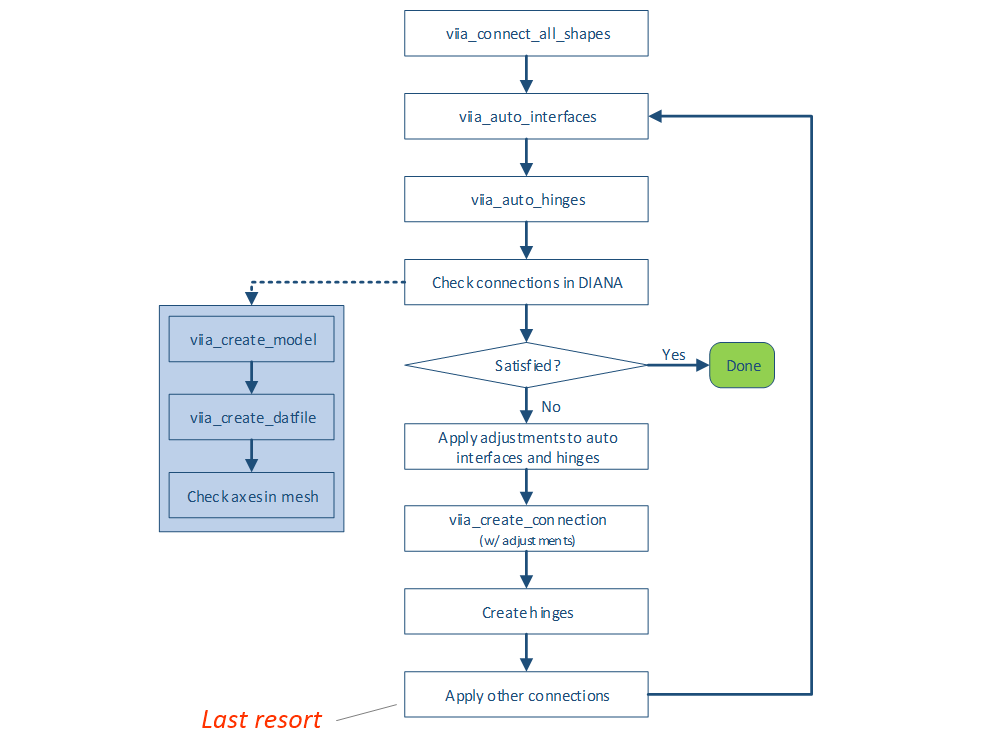
Figure 2.2 - General workflow for applying connections in your model.
What it is:
Fast way to bulk apply standard connections in the model;
Give more time for engineer to focus on complicated connections;
Allows models to be more flexible and less rigid as time constraint is no longer present.
What it isn’t:
The functions do not produce final detailing for the models;
Connections created by the algorithm are not governing; final connections should follow what is present in the building and what is described in UPR.
You can find the explanation how to apply automatic connections here: Using automatic interfaces and hinges in viiaPackage.
Currently supported connections are: Supported connections:
Hinges
D2.01
D2.01A
D2.01B
D2.03
D2.07
D4.02
UNITE-L
UNITE-P
NOCON-L
The recording of the instruction on the theory of connections can be found here:

Figure 2.3 - Instructions on theory of connections in DIANA and viiaPackage.
2.2.2. Exercise 1 - Override auto connections
Apply D5.01B between one of the roof parts and one of the N3 walls.
Check the axes and perform corrections if necessary.
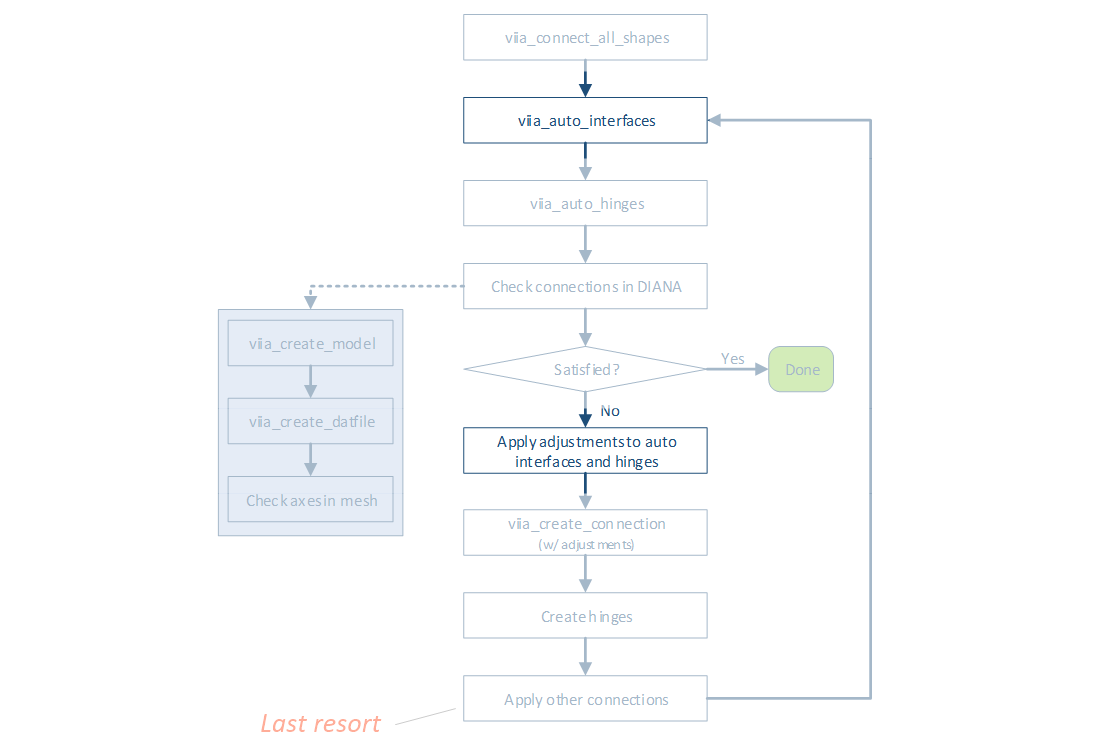
Figure 2.4 - Override the auto connection function.
The following recording shows the explanation of the exercise:

Figure 2.5 - Instructions on exercise 1.
Solution
The following recording shows the solution of the exercise:

Figure 2.6 - Instructions on solution of exercise 1.
>>> walls = [wall13, wall14, wall15, wall16]
>>> roofs = [roof21, roof22, roof23, roof24]
>>> overrides = [[wall.name, roof.name,'D5.01B'] for wall, roof in
        zip(walls,roofs)] project.viia_auto_interfaces(override_connections=overrides)
2.2.3. Exercise 2 - Disabling connections
Disable connection between steel beam and timber floor.
Create a line hinge between steel beam and timber floor in DIANA itself.
Place DIANA code back into the mainscript.
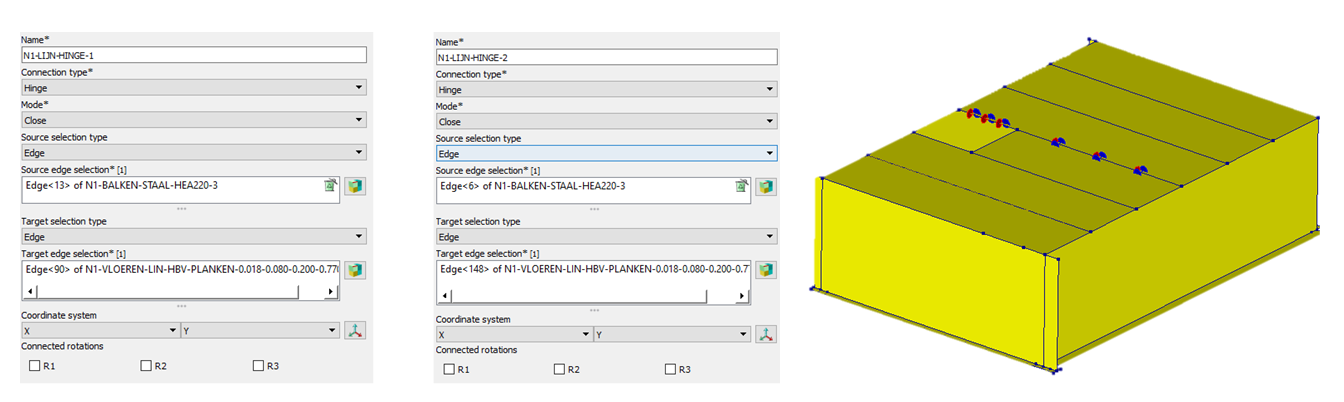
Figure 2.7 - Disabling auto generated connections.
The following recording shows the explanation of the exercise:

Figure 2.8 - Instructions on exercise 2.
Solution
The following recording shows the solution of the exercise:

Figure 2.9 - Instructions on solution of exercise 2.
>>> project.viia_auto_interfaces(disable_connections=[[beam4.name,floor1.name],])
2.2.4. Exercise 3 - Replace interfaces
Replace all D2.01 interfaces for non-linear (default) to linear without setting other interfaces to linear.
The following recording shows the explanation of the exercise:

Figure 2.10 - Instructions on exercise 3.
Solutions
The following recording shows the solution of the exercise:

Figure 2.11 - Instructions on solution of exercise 3.
>>> replace = {'D2.01':['D2.01',{'is_linear': True}]}
>>> project.viia_auto_interfaces(replace_interfaces= replace)
2.2.5. Exercise 4 - Override hinges
Change hinge of timber column so that rotations around z axis is locked.
The following recording shows the explanation of the exercise:

Figure 2.12 - Instructions on exercise 4.
Solutions
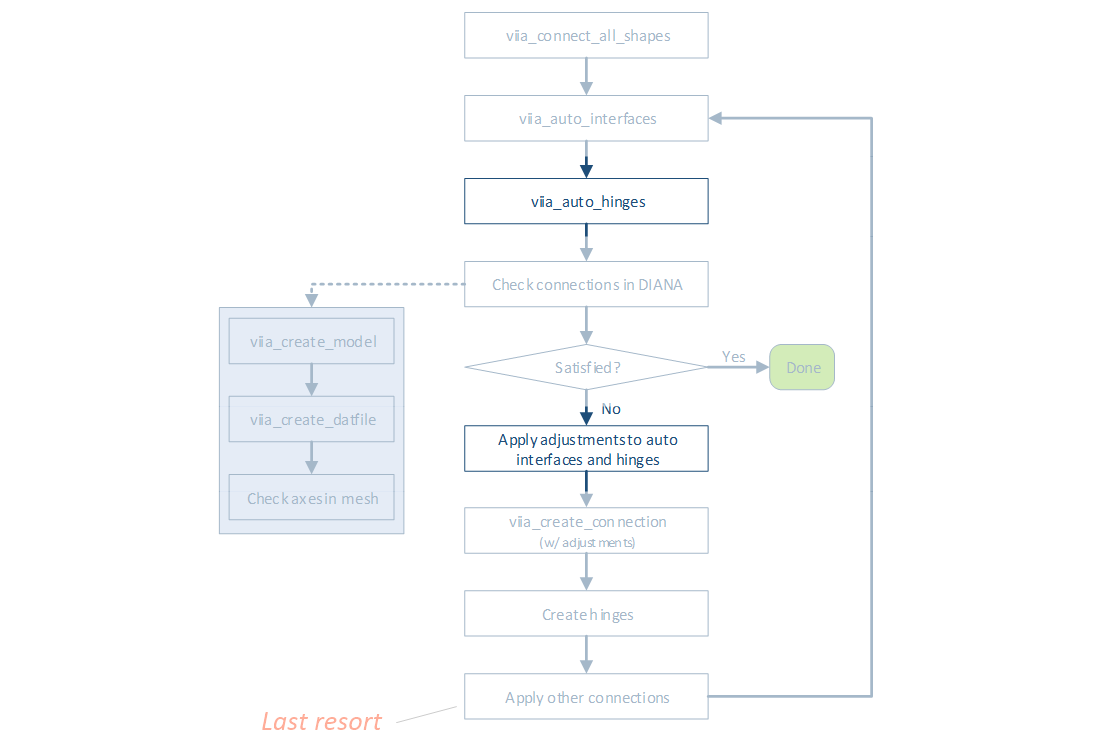
Figure 2.13 - Make changes to auto generated connections.
The following recording shows the solution of the exercise:

Figure 2.14 - Instructions on solution of exercise 4.
>>> override = [['N1-KOLOMEN-LIN-HOUT-200x200-1','N1-WANDEN-MW-KLEI<1945-350-5','H_RRF']]
>>> project.viia_auto_hinges(override_hinges= override)
2.2.6. Exercise 5 - Disable hinges for whole nodes
Disable hinges that are created at the node at the top of the roof where two steel beams connect.
The following recording shows the explanation of the exercise:

Figure 2.15 - Instructions on exercise 5.
Solutions
The following recording shows the solution of the exercise:

Figure 2.16 - Instructions on solution of exercise 5.
>>> disable = [project.find_node(point=[4.30750,2.87250,9.67500])]
>>> project.viia_auto_hinges(disable_nodes = disable)
2.2.7. Exercise 6 - Override auto connections
Apply D5.01B between one of the roof parts and one of the N3 walls.
Check the axes and perform necessary corrections.
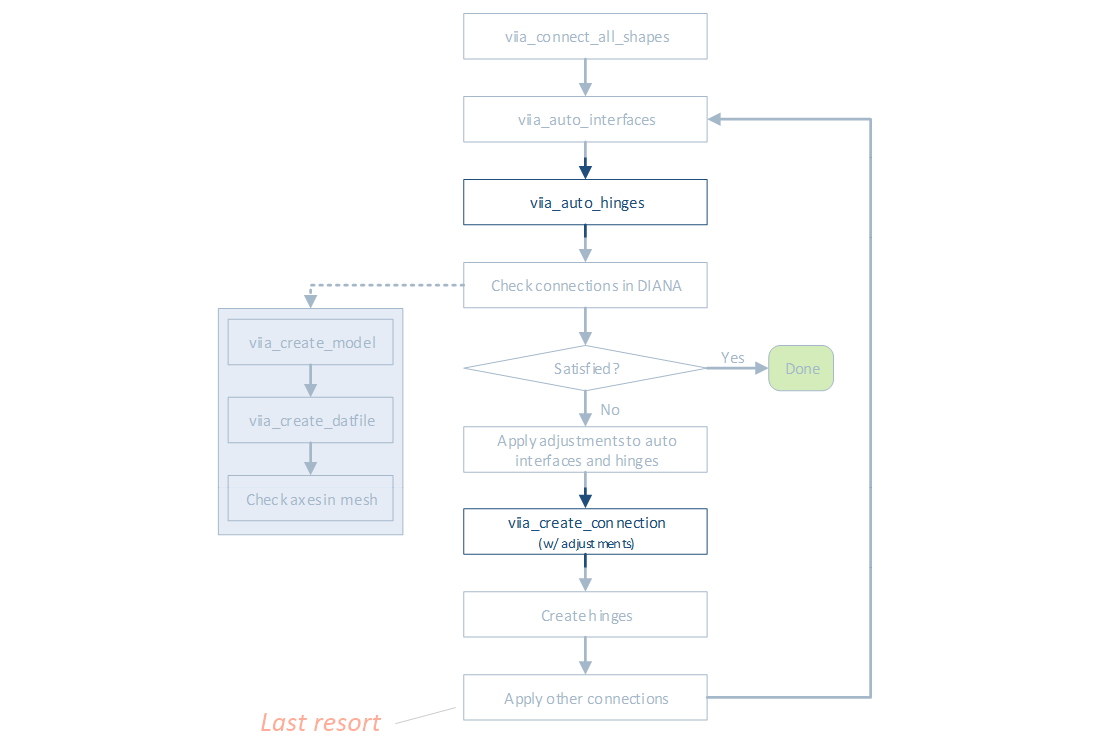
Figure 2.17 - Override auto generated connections.
The following recording shows the explanation of the exercise:

Figure 2.18 - Instructions on exercise 6.
Solutions
The following recording shows the solution of the exercise:

Figure 2.19 - Instructions on solution of exercise 6.
>>> walls = [wall13, wall14, wall15, wall16]
>>> roofs = [roof21, roof22, roof23, roof24]
>>> for wall in walls:
        for roof in roofs:
            connecting_shapes = wall.get_connecting_shapes()
            if roof in connecting_shapes:
                project.viia_create_connection(detail='D5.01B', source_name=wall, target_name=roof)
2.2.8. Exercise 7 - Override and adjust auto connections
Apply D1.01 between N2-WANDEN-MW-KLEI<1945-350-1 and N3-VLOEREN-LIN-BETON-100-1.
Check the axes and perform necessary corrections.
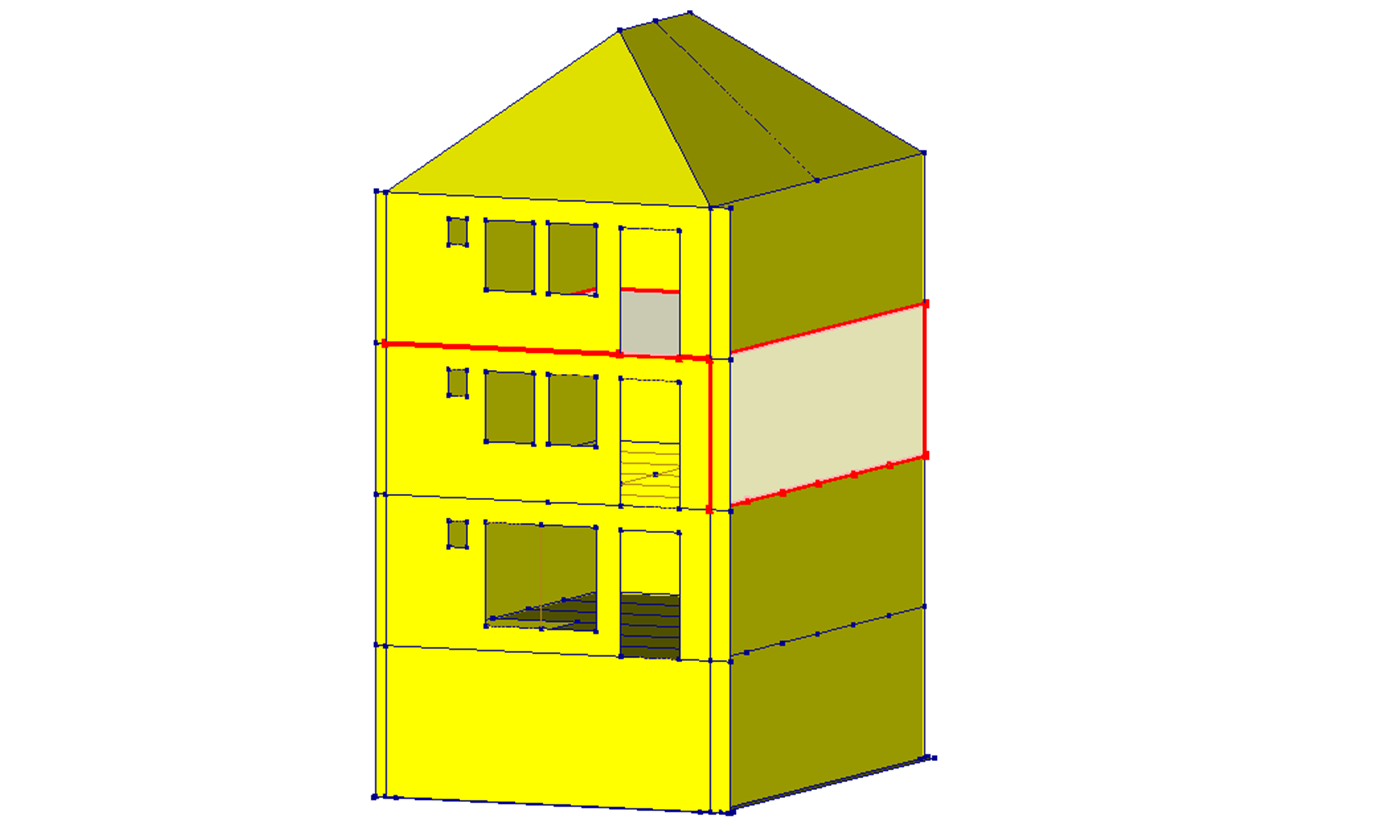
Figure 2.20 - Override and adjust auto generated connections.
The following recording shows the explanation of the exercise:

Figure 2.21 - Instructions on exercise 7.
Solutions
The following recording shows the solution of the exercise:

Figure 2.22 - Instructions on solution of exercise 7.
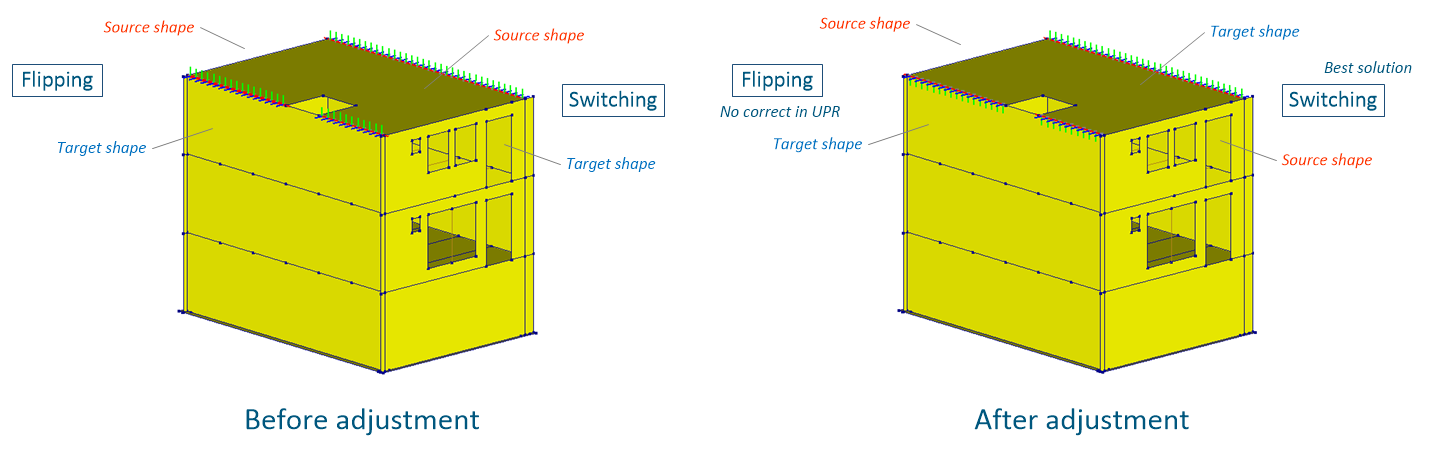
Figure 2.23 - Switching and flipping the interface.
Solution 1: (best)
>>> project.viia_create_connection(detail='D1.01', source_name=floor20, target_name=wall10, switch=True)
Solution 2: (Not strictly correct in UPR, but okay otherwise)
>>> project.viia_create_connection(detail='D1.01', source_name=floor20, target_name=wall12, flip=True)
2.2.9. Exercise 8 - Override and adjust auto connections
Apply D5.01B between one of the roof parts and one of the N3 walls.
Adjust the local y-axis of the interface to point into the plane of the roof.
The following recording shows the explanation of the exercise:

Figure 2.24 - Instructions on exercise 8.
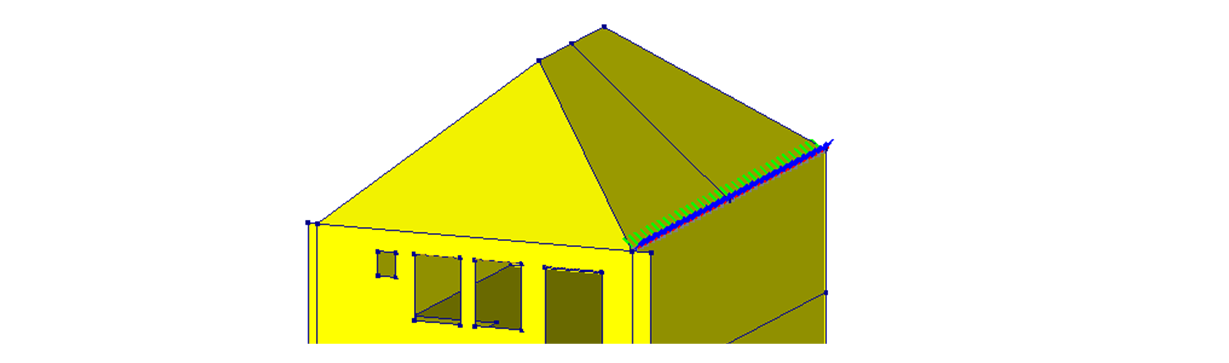
Figure 2.25 - Override auto generated connections.
Solutions
The following recording shows the solution of the exercise:

Figure 2.26 - Instructions on solution of exercise 8.
>>> local_y_axis = fem_unit_vector_2_points([4.3075, 0.105, 7.29], [4.3075, 2.8725, 9.675])
>>> project.viia_create_connection(detail='D5.01B', source_name=wall14, target_name=roof21, local_y_axis=local_y_axis)
Note
We hope you enjoyed this workshop. Let us know if you have any question or suggestion.